Startup Configuration
Once deployed, accessing Control Center is straightforward. For local clusters, navigate to http://localhost:8000 on your browser, and you’ll be presented with the Startup Configuration Wizard. This wizard is an essential part of the setup process, guiding you through configuring authentication and other necessary settings for Control Center to function correctly.
The Startup Configuration Wizard is designed to set up authentication to access Control Center using OpenID Connect. It explains the steps required to finish installation of Control Center.
The first step requires you to write a passkey. Assuming Control Center was installed in the control-center namespace, you can find the passkey by running the following command:
kubectl -n control-center get secret control-center-passkey -o jsonpath='{.data.passkey}' | base64 --decode|
Note
|
Windows users may have to run the command without | base64 --decode and use some other base64 decoder tool to get the passkey.
|

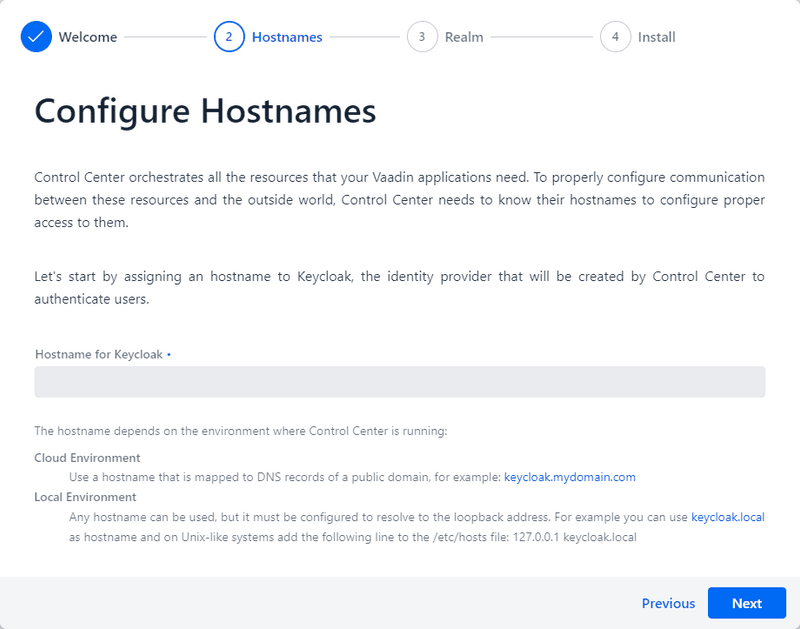
Configure Keycloak Hostname
Next, you’ll configure the hostname for Keycloak. This should be a unique external URL that can be used to reach the Kubernetes cluster. For a cloud environment, this can be something like keycloak.mydomain.com. For a local environment, you’ll need to create an entry in your operating system’s hosts file.

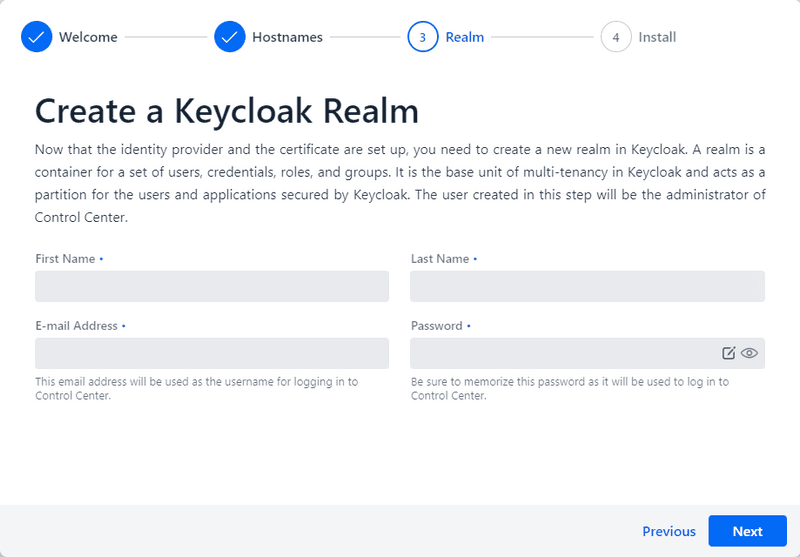
Configure Administrator Account
Next, configure an administrator account for the Control Center. Enter a name, email address, and choose a password for the account.

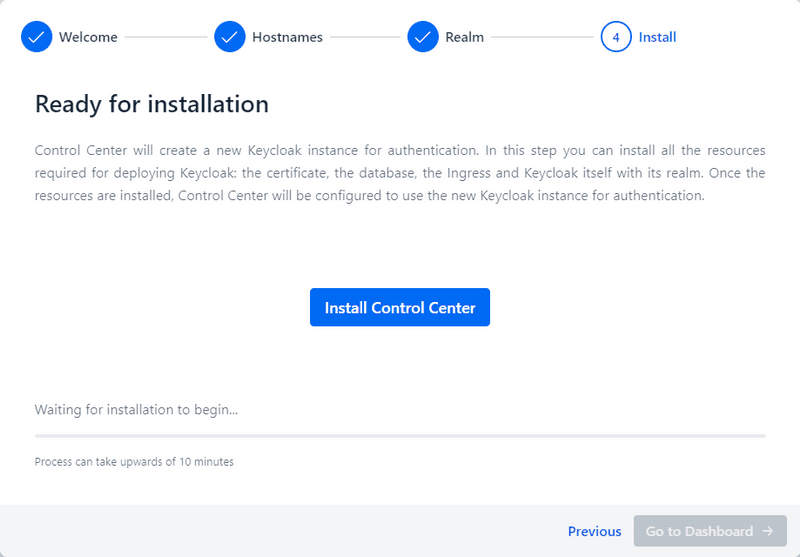
Installation
The final step installs all of the resources that Control Center needs. This involves setting up Keycloak configuring the administrator account, and ensuring all necessary dependencies and services are correctly installed.

After completing these steps, you’ll be directed to the Keycloak login page to authenticate. Once authenticated, you can gain access to the Control Center dashboard, marking the completion of the setup process.
Conclusion
Having finished setting up Control Center, you’re now ready to leverage its comprehensive features to manage and monitor your Vaadin applications and services on Kubernetes. Control Center is designed to streamline your operations, offering a centralized platform for managing your Vaadin deployments, efficiently.