
In this tutorial you learn to deploy your Java-based Vaadin application in a Docker container and run it locally.
Configuring Docker is a complex topic that has, by now, filled many articles and books. This tutorial gives you a short and simple example of how to start a Vaadin application in a Docker container.
You can find the final code on GitHub.
1. Install Docker
The first step, of course, is to install Docker. To do this, download the setup file for your operating system and install the application on your system. You can find the installers at https://www.docker.com/get-started.
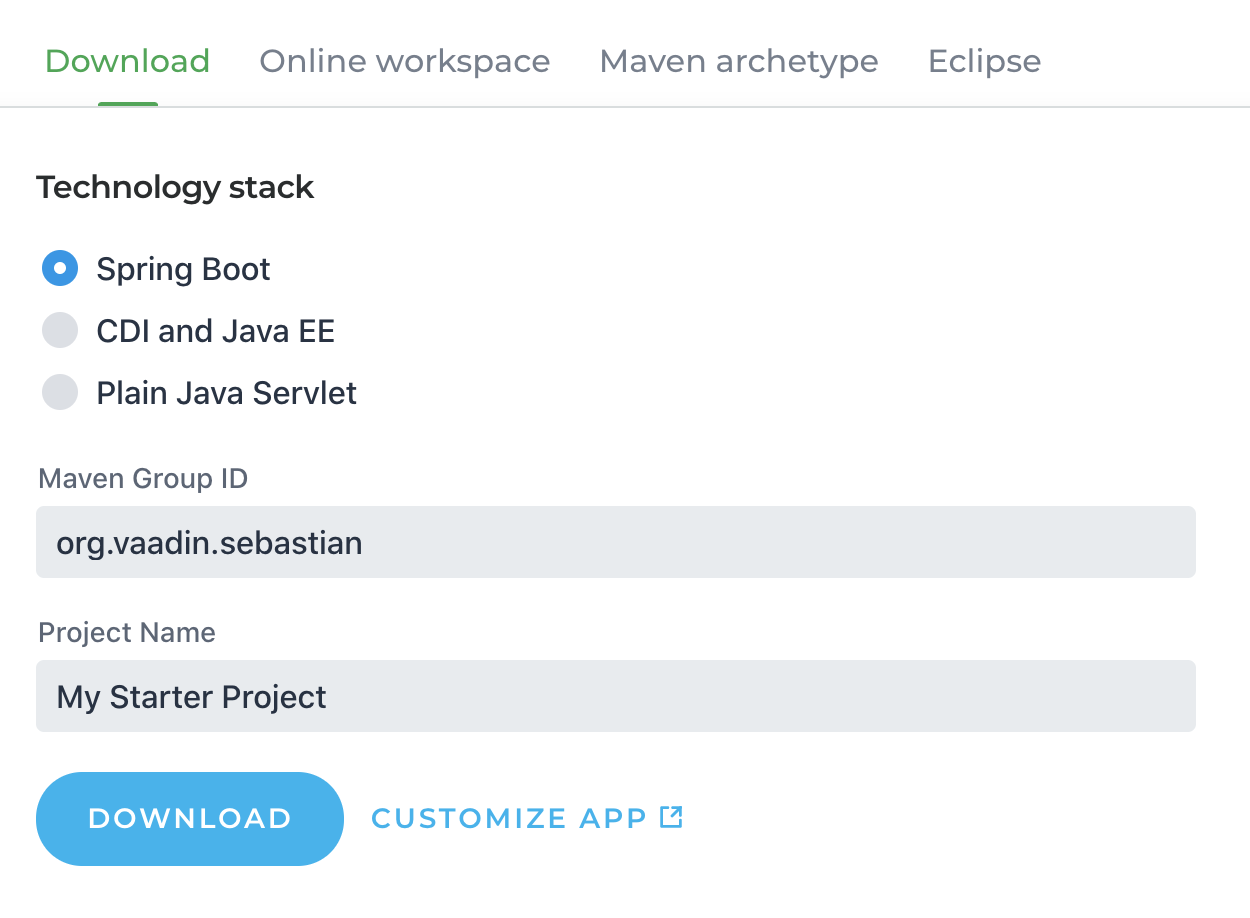
2. Create a Vaadin application
Next, create a Vaadin application, if you don’t already have one. For this, go to https://vaadin.com/start and generate an application with Spring Boot.
The default parameters, like the application and package name, are used in the tutorial, but you can change them and adapt the tutorial if you prefer.
3. Build the Vaadin application
Next, you need to build a Vaadin application with the production profile. This creates an optimized bundle of frontend dependencies and turns off debug logging that could expose sensitive data.
In the console, run:
mvn install -Pproduction
You can try the application locally by running:
java -jar target/my-starter-project-1.0-SNAPSHOT.jar
4. Build a Docker image
Next, create the docker image that will start the Vaadin application JAR and make it available on port 8090. For this, create a file named Dockerfile with the following content:
 FROM openjdk:11
WORKDIR /
ADD target/my-starter-project-1.0-SNAPSHOT.jar app.jar
RUN useradd -m myuser
USER myuser
EXPOSE 8090
CMD java -jar -Dspring.profiles.active=prod app.jar
The Dockerfile:
-
Creates an image based on OpenJDK 11.
-
Copies the JAR into the working directory.
-
Creates and switches to a non-root user.
-
Exposes port 8090.
-
Starts the application with the Spring prod profile.
5. Build and run the Docker container locally
Before you can run the Dockerfile, you need to build an image. Do this by running the following command (notice the period at the end that refers to the current directory): docker build -t vaadin-docker .
You now have a Docker image containing your Vaadin app, tagged as vaadin-docker. Start the container and run the application by running the following in your terminal (make sure you have stopped the previous version of the app, if you started it in step 4):
docker run -ti -p 8090:8080 vaadin-docker
This starts the container and runs the application inside of it. The container’s port 8080 is available at port 8090. You can now access your application on localhost:8090.
Summary and next steps
Your Vaadin application is now Dockerized and ready to be deployed to any service that runs Docker containers. Read more about deploying Vaadin applications to cloud providers in our cloud deployment tutorial series.